- Network-Manager description
- Using nmcli, the command line interface for Network-Manager
- Managing your wifi with nmcli Network Manager interface
- Starting, stopping and disconnecting network interfaces with nmcli Network Manager interface
NetworkManager seeks to keep connectivity through Ethernet, WIFI, PPPoE and allows VPN (Virtual Private Network). It has several graphical interfaces for GNOME, KDE, Cinnamon and more, it simplifies the network configuration including network devices, gateways configuration, IP address assignation, VPN, bridges, DNS and additional options.
Learning where settings are on Network Manager can help for example when you want to know how to reveal the current or a former wifi connection password.
This tutorial focuses on network-manager itself and nmcli which is the command line interface to manage Network-Manager with a brief description of the graphical interface for GNOME which is really intuitive. Instructions are for Debian based Linux distributions which includes Network-Manager by default, therefore there are no installation instructions, but if you used WICD to manage your connections probably your network-manager won't launch automatically, if that's your case you need to remove the network manager and reinstall it.
Network-Manager graphical description
Note: This section describes the graphical interface of network-manager which is user friendly and intuitive, for command line instructions jump to nmcli tutorial section.
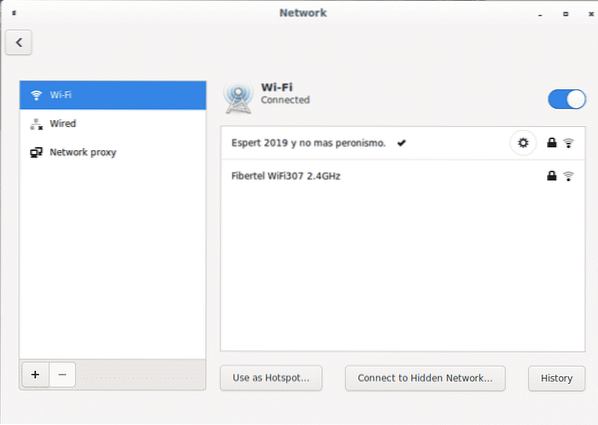
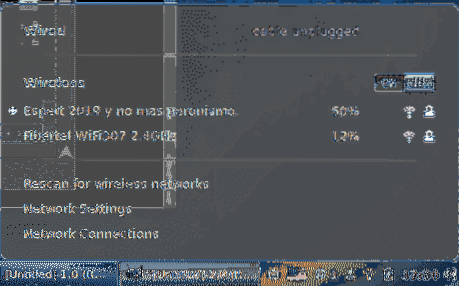
The network-manager is a daemon starting when the system boots, it can be graphically found in the Gnome applets, next to the clock or sound icons, if you are connected through wifi you'll find a waves icon like in my example below, through Ethernet you'll find connected wired devices.
At the top you'll find the wired connections, then the wireless connections with the option to disable your wireless card, the option to rescan for available networks, Network Settings and Network Connections.

Network settings:
On the network settings section you have options like disabling your wifi card or connect to networks,including hidden networks, setup proxies and more:
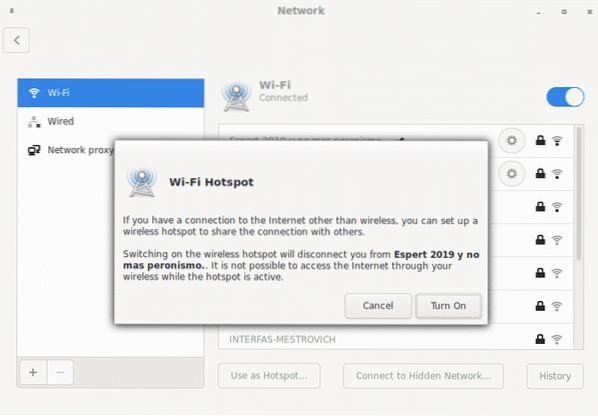
Among the available options you can use your device as hotspot easily if you have an additional connection, you can not use your device as hotspot while being used to connect to the internet, but you can share for example, your ethernet connection through your wifi device.
On the window bottom you can find symbols + and - to edit additional options to add and remove VPN connections importing files.
On the network settings main screen next to each connection there are a gear icon to access additional configuration options, a padlock showing if the connection is protected and the signal power:

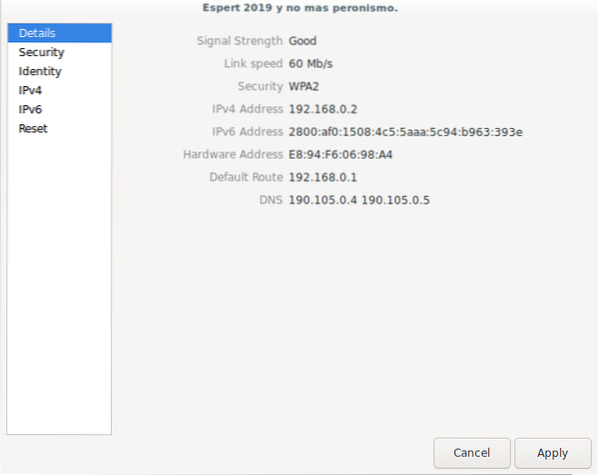
By clicking on the gear of the established connection you can get and edit settings, the first section “details” will summarize the connection configuration:
The second section “security” displays the encryption type and allows to show the current wireless connection password:
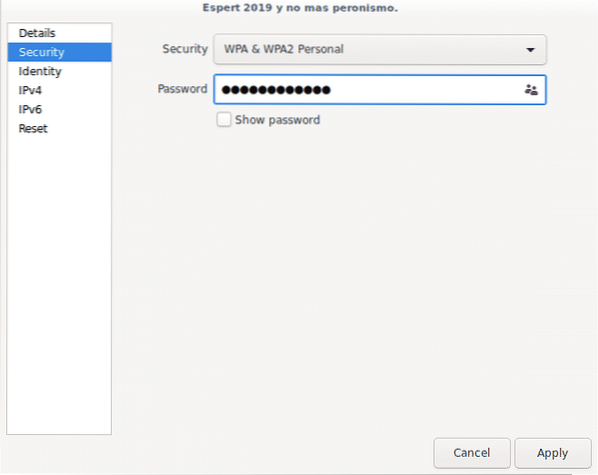
To show the password just mark the “show password” option.
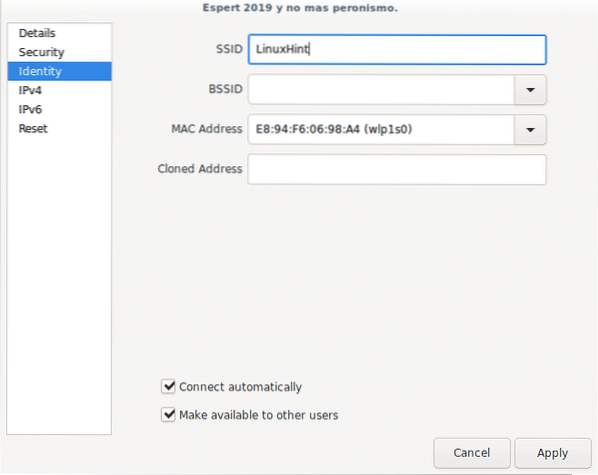
The third section “identity” shows the wifi connection name, the router and local mac addresses:
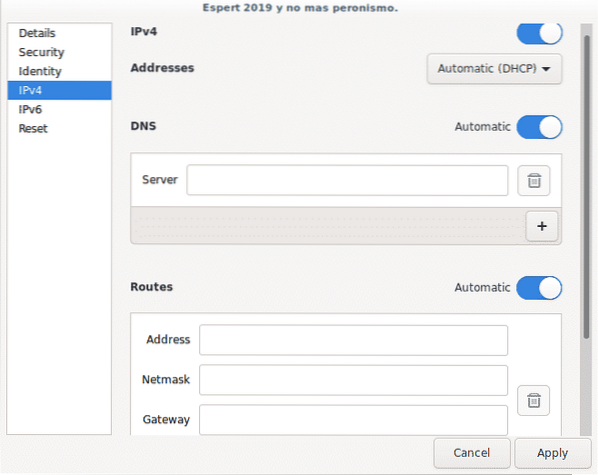
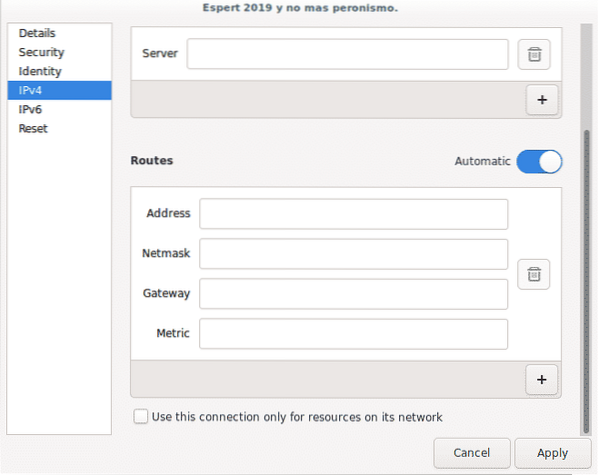
The fourth section “IPv4” allows to enable or disable this protocol, the DHCP service, the DNS and routing options for the IPv4 protocol only.
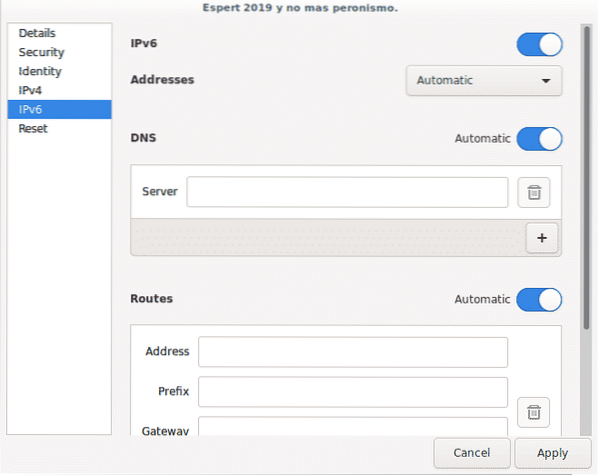
The fifth section “IPv6” is the same than above but for IPv6 protocol:
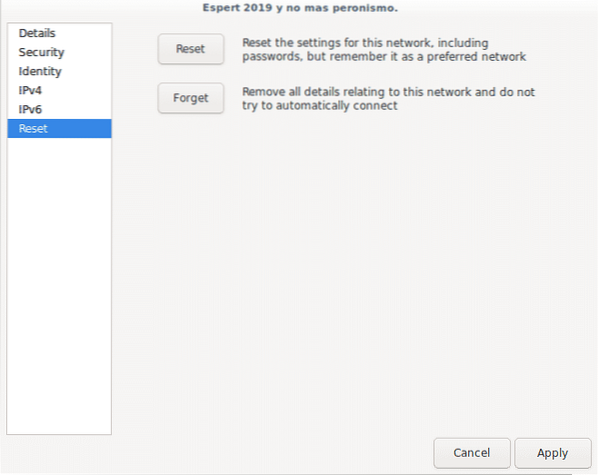
Finally on the last section you can reset all connection settings with option to keep the connection as preferred or not to prevent it from connecting automatically again.
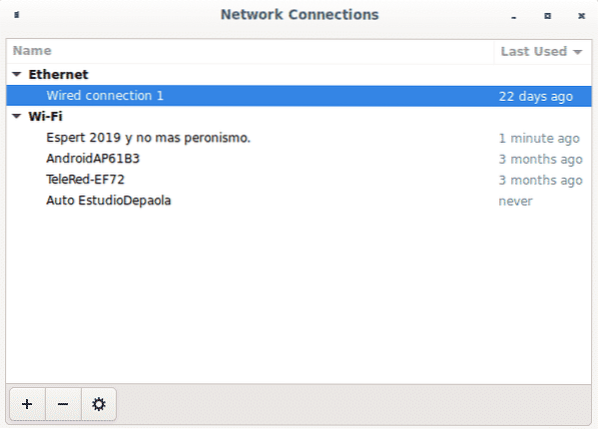
Network connections:
Going back to the menu on the applets bar now click on Network Connections:
On the main menu you'll see all available connections classified by type, at the bottom you'll see symbols + and - to add and remove connections.
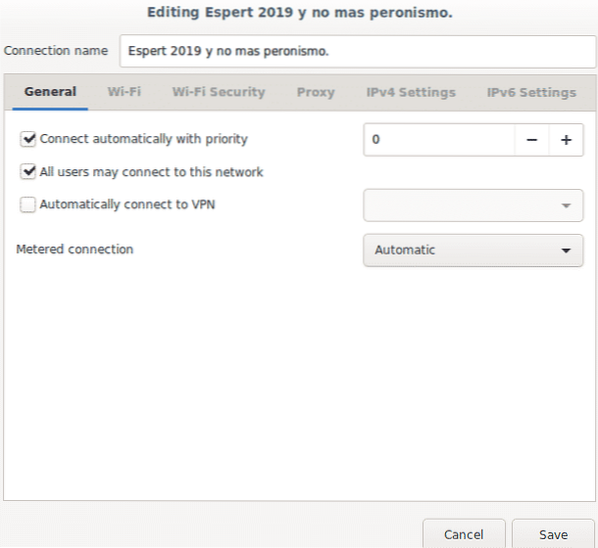
Next to them there is a gear icon to configure the same options we saw before, the first tab General allows to set the connection preference to connect automatically, to define which users can connect to the network and VPN automation:
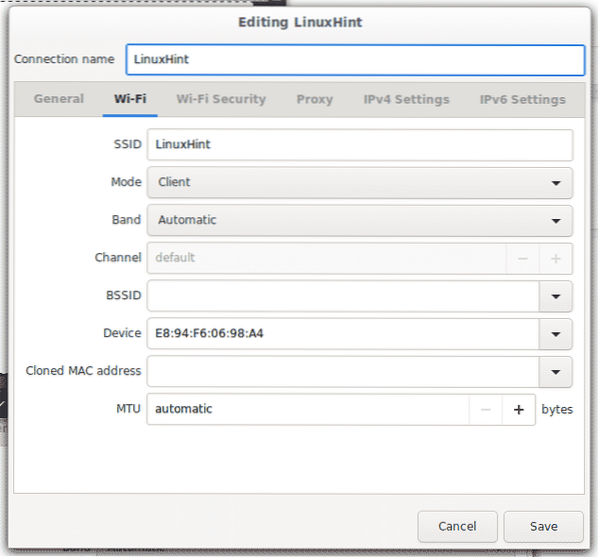
The next tab Wi-Fi shows the connection name, the connection mode (client, hotspot or ad hoc), frequency, channel, mac addresses (bssid) and MTU (Max. transmission unit).
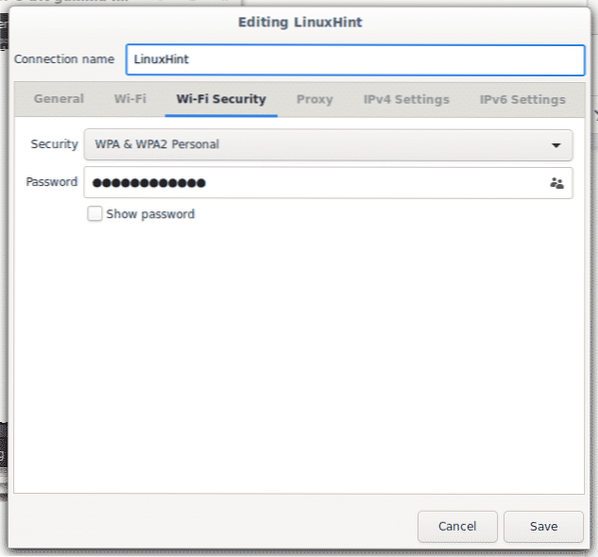
Next tab Wifi-Security shows the encryption type and allows to reveal the currentor former password (depending if you are checking a current connection or an outdated one).
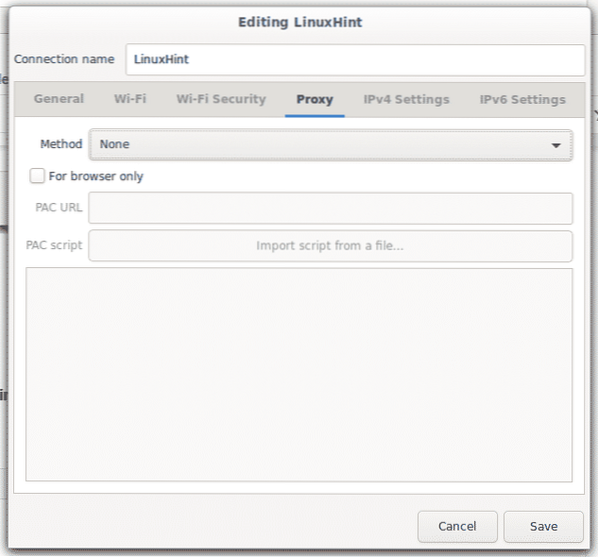
Next tab allows to configure a proxy for the whole connection or to browse, you can specify it:
Tab IPv4 allows to change configuration for this protocol such as gateways, DNS and DHCP.
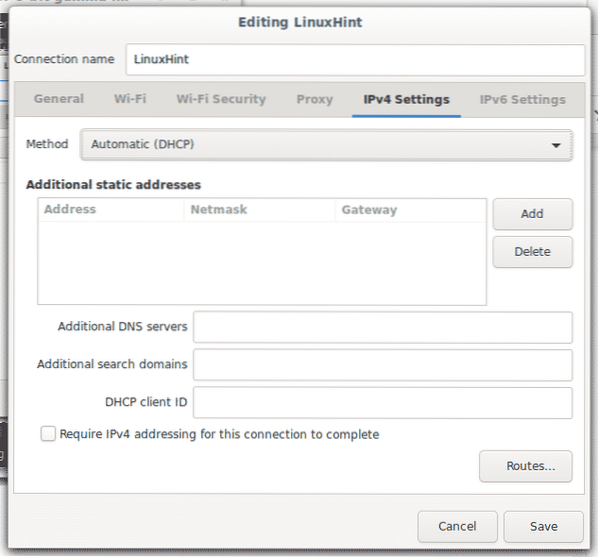
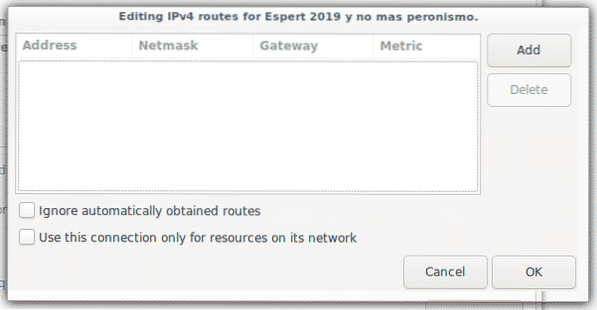
To edit your gateway click on Routes…
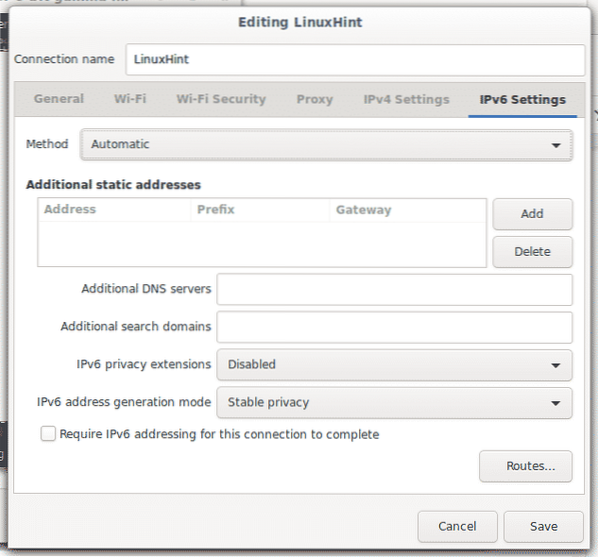
Finally you have the IPv6 tab similar to IPv4 but for the IPv6 protocol:
These are all available options on the Network Manager.
Now let's see a little about nmcli to see some settings from the command line.
Using nmcli, the command line interface for Network-Manager
The option -h will display all available options for this command.
nmcli -h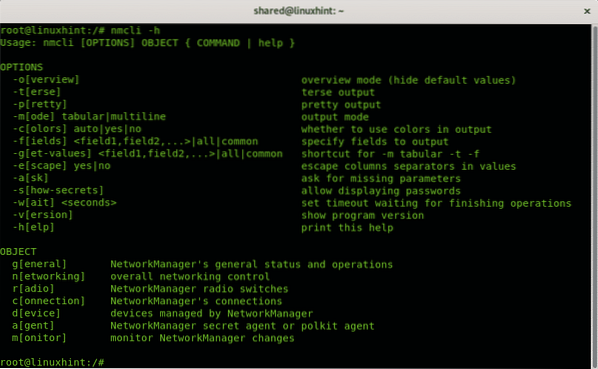
As you can see there are two categories, OPTIONS and OBJECT, where OPTIONS you can instruct how information should be printed and OBJECT what information should be printed.
Among the available options for nmcli you'll find:
- -o: When using options to display information, the -o (overview) option is useful to summarize the output omitting empty properties and default settings
- -t: The options -t (terse) is used for scripting, by applying this options you can display only values.
- -p: Contrary to the -t option, the -p (pretty) option is to optimize the output for humans, by using this option the output will be listed in columns.
- -m: By default nmcli shows the output in tabular mode. The options -m (mode) allows to change the output to multiline mode.
- -c: This option is to color the output.
- -f: The option -f (field) is useful to specify what fields should include in the output.
- -g: Same than -m
- -e: The option -e (escape) is useful to escape separators (“:”, “\”).
- -a: The option -a (ask) instructs network-manager to ask additional information if needed, like passwords.
- -s: The option -s (show secret) shows passwords.
- -w: The option -w (wait) allows to limit the time for the requested operation.
- -v: The option -v (version) shows the nmcli version.
In the OBJECT section there are 7 options:
- general: This allows to display the Network-Manager status, permissions, hostname and logging level for domains.
- networking: This object is also useful to display the status, to enable and disable networking.
- radio: This object allows to check the wireless state and to turn off and turn on the wireless card.
- connection: This object allows to display connections, add, modify, clone, export, import connections and more.
- device: This object allows to display the status, to connect, disconnect network devices, to list, connect and rescan wifi networks.
- monitor: This object allows to monitor NetworkManager connectivity.
Getting information on network devices with nmcli Network Manager interface:
The following command will show complete information on each network device:
nmcli device show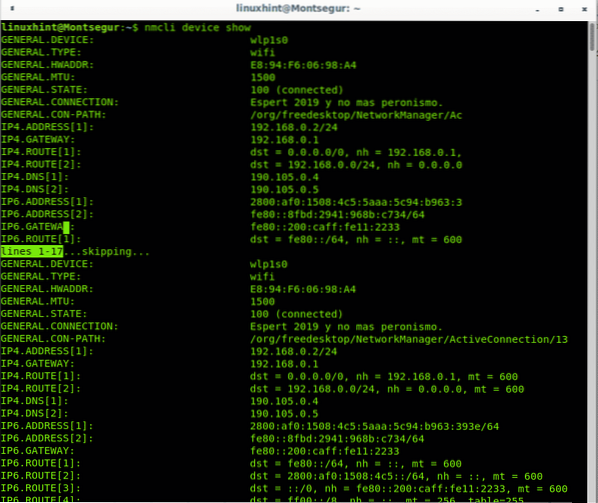
The following example shows the same output optimized for human view through the -p (pretty) option described above:
nmcli -p device show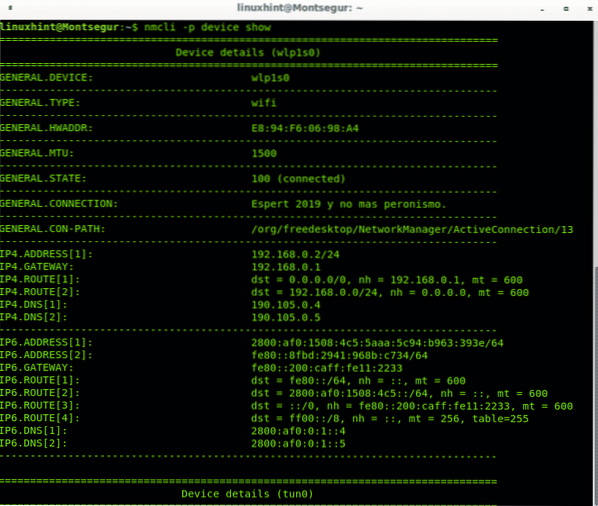
You can get a summarized view on all devices status by running:
nmcli device status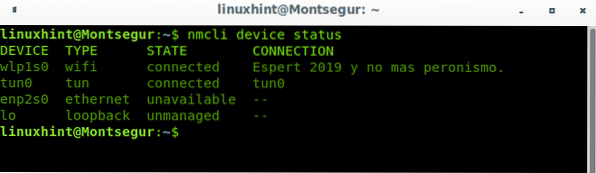
You can also display information on a specific device:
nmcli dev showIn my case:
nmcli dev show wlp1s0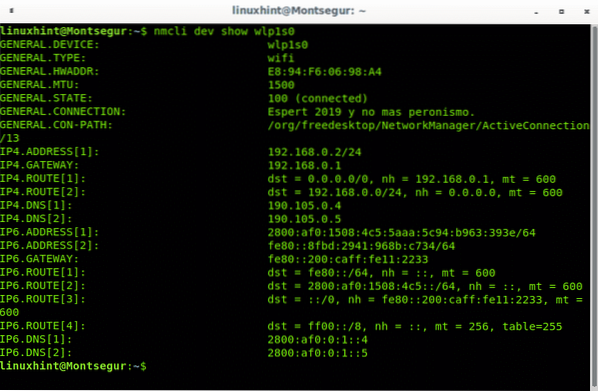
Managing your wifi with nmcli Network Manager interface:
If you want to check your wireless status use the object radio:
nmcli radio
You can disable the wifi adapter by specifying it adding the option off:
nmcli radio wifi off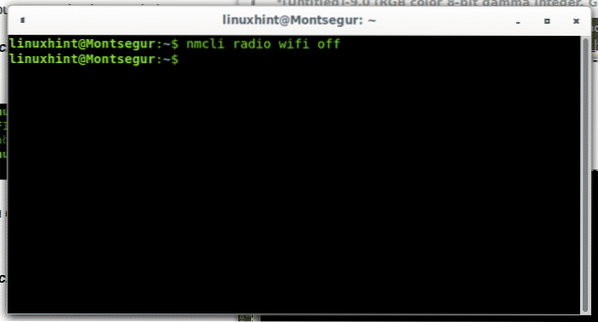
By using the option on you can enable your wifi:
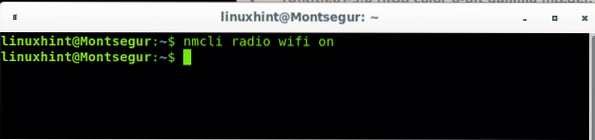
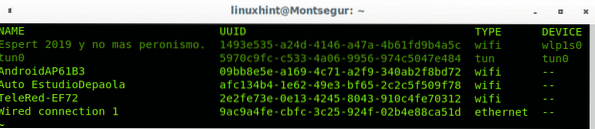
When we establish a connection, a profile containing the necessary information to establish it again in the future is created,to print the profiles run:
Starting, stopping and disconnecting network interfaces with nmcli Network Manager interface:
To disable a connection run:
nmcli con down id '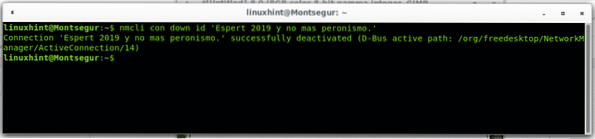
Note: while single quote are not mandatory they are useful for connections including spaces, usually on wireless connections.
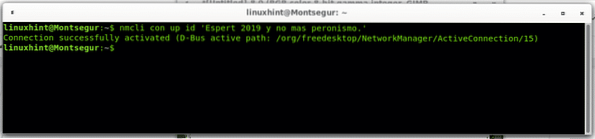
You can enable the connection by replacing the down for up as in the following example:
You can also disconnect and connect devices instead of connections, when you disable a connection invoking the device instead of the connection name it will prevent the connection from reestablishing automatically:
nmcli dev disconnect wlp1s0
To connect just replace “disconnect” for “connect”:
nmcli dev connect wlp1s0
I hope you found this tutorial on Network Manager useful. Keep following LinuxHint for more tips and updates on Linux and networking.


